
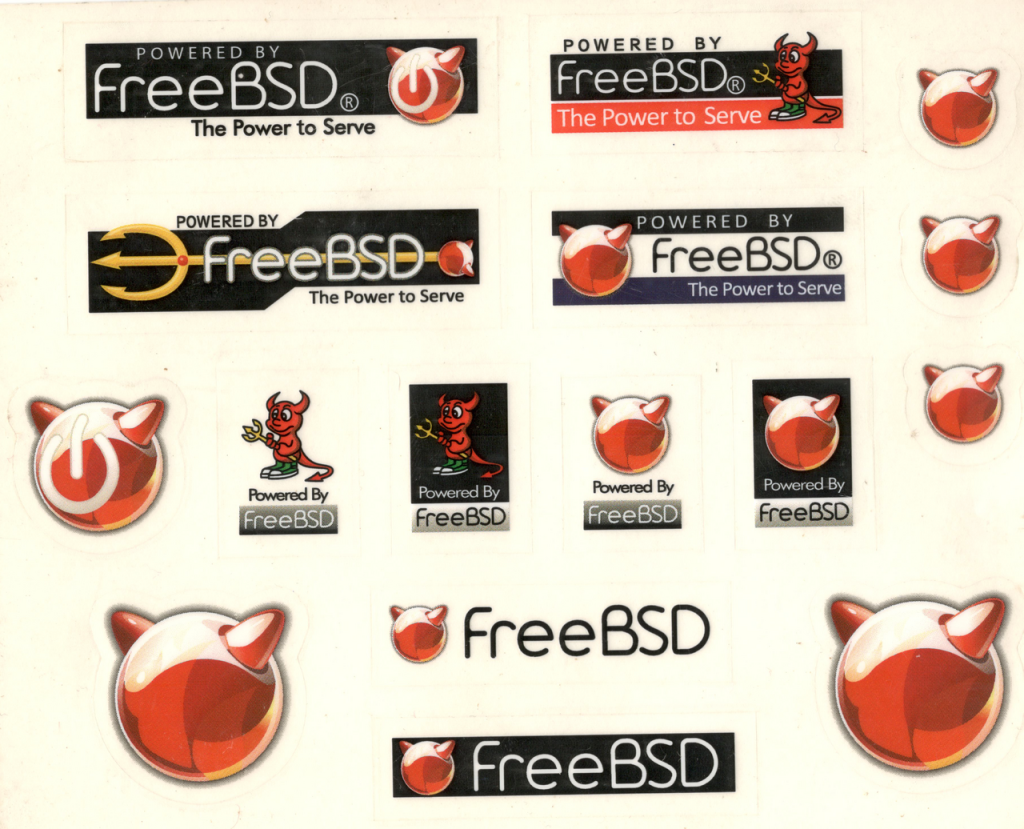
Most sticker projects go wrong before the printer ever starts: the art sits too close to the edge, the cut line is missing, or the file was built at a size nobody can hit. Good sticker templates solve those problems in advance, because the layout rules are already baked in. This guide walks through what a template should contain, how to adapt one to your own artwork, and what to check before you send anything to a print shop.
What a sticker template actually gives you
A template is more than an empty rectangle. A decent one shows you three zones. The inner zone is the safe area, where text and logos can live without any risk of being trimmed. The bleed zone is a thin band of extra artwork that runs past the cut line, so a slightly shifted blade never reveals a white edge. The cut line itself is the path the machine follows, and it is usually drawn as a separate spot colour or a named layer so the printer can switch it on and off.
If a template you downloaded has none of those, treat it as a rough sketch rather than a production file. You can still use it, but you will need to add the guides yourself.
Die-cut, kiss-cut and sheets
These three words get mixed up constantly, so it helps to separate them.
- Die-cut stickers are cut all the way around the artwork, and each sticker comes as its own piece with the backing cut to the same shape.
- Kiss-cut stickers are cut through the vinyl only, leaving the backing paper intact. They are easier to peel and cheaper to ship flat.
- Sticker sheets hold several designs on one backing, with kiss cuts around each one.
Each of these needs a slightly different template. A sheet template needs consistent gaps between designs, usually a few millimetres, so the cutter never crosses into a neighbour.
Sizes that tend to work
Small round stickers are comfortable at around two inches across, while laptop-style stickers often land between three and four inches. Anything under an inch gets fiddly to peel, and fine text on it becomes unreadable. Whatever size you choose, check the minimum line weight your printer recommends. Hairlines that look elegant on screen can vanish in vinyl.
Setting up your artwork
Start by placing your artwork on its own layer inside the template. Extend the background colour or pattern out to the bleed line, not just to the cut line. Keep every important element inside the safe zone. If your design has an irregular outline, create the cut path by offsetting the shape outward by a couple of millimetres, then smooth any sharp corners, because machines round tight points anyway and sharp ones tend to lift at the edge.
Text deserves its own caution. Convert it to outlines before exporting, unless your printer asks for live fonts, so nothing gets swapped for a default typeface on their side.
Colour and material choices
Screens glow and paper does not, so a bright neon on your monitor will print duller. Work in CMYK if your printer asks for it, and ask for a proof if colour matters, for example when matching a brand. Finish matters too. Matte hides fingerprints and looks calmer, gloss makes colours pop, and a clear vinyl lets the surface show through, which only works if the artwork has enough solid areas.
File formats
Vector files such as PDF or SVG are the safest for logos and flat illustrations, since they scale without blur. For photographic stickers, a high-resolution PNG or a flattened PDF at roughly 300 pixels per inch is the usual request. Always read the printer’s upload notes, because a few of them want the cut line as a separate file.
A quick pre-print checklist
- The artwork reaches the bleed line on every side.
- Nothing important sits near the cut line.
- Text is outlined or fonts are embedded.
- The cut path is a clean, single closed shape.
- The colour mode and resolution match what the printer asked for.
- You have ordered one sample before committing to a large batch.
Where templates fit into a bigger project
Stickers rarely live alone. They end up on packaging, in welcome kits and on laptops at events, so it makes sense to keep a consistent look across them. If you are also preparing flyers or printed cards, the same grid and colour habits carry over. Our post on how to choose a website template uses similar thinking about consistency, and the walkthrough on tattoo templates shows how stencil-style artwork gets prepared for a different kind of surface. If you sell your stickers, a clear price makes life easier; see how to price your services.
Questions people ask
Can I use a photo as a sticker?
Yes, but give it a clear edge. Photos with busy backgrounds make cut paths awkward, so cut out the subject first, or place it on a solid shape with a small border. A white outline of two or three millimetres around the subject is a classic look and helps the sticker stay visible on dark surfaces.
Are stickers waterproof?
That depends on the material, not the template. Vinyl stickers with a laminate or a protective finish handle water and sun better than paper ones, which swell and fade. Tell the printer where the sticker will live, such as a water bottle or a car, and ask which material they recommend.
Final thought
Treat a sticker template as a promise: this file will survive the cutter. Fill in the safe area carefully, keep the bleed generous and test one small print run. For a general overview of how adhesive labels are made, the page on stickers at Wikipedia is a handy reference.

Written by thadmin_r7
The Templates Hub editorial team writes practical, plain-English guides for everyday readers.
More articles by this author →
Nail Templates: Stencils, Guides and Printable Shapes Guide
If you have ever tried to paint a clean French tip freehand, you already know why nail templates…
Router Templates for Woodworking: Make Reusable Jigs
Router templates are simple guides that let a woodworker cut the same shape again and again. A well-made…
Avery.com Templates: Finding and Using Label Layouts
www.avery.com templates explained: match your product number, pick the right layout, set up the print and avoid common…
Infographic Templates: Tips to Make Data Easy to Read
Infographic templates let you present facts, steps and comparisons as pictures that people actually finish reading. Rather than…