
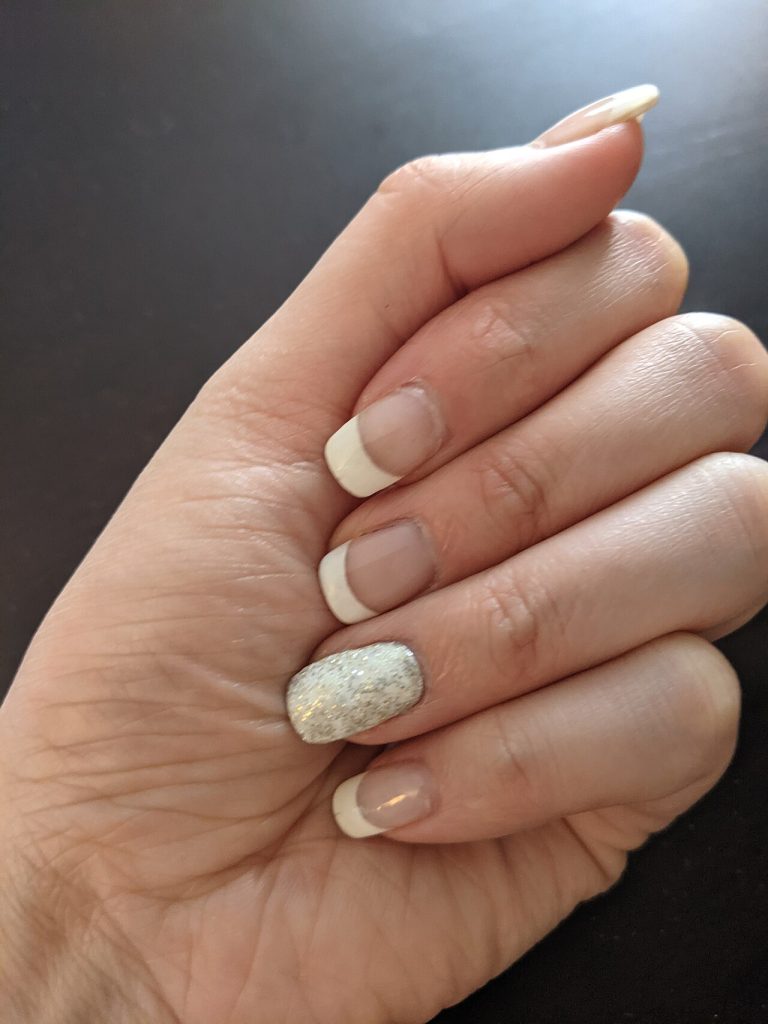
If you have ever tried to paint a clean French tip freehand, you already know why nail templates exist. A thin guide that sits on the nail gives you a crisp edge, a matching shape on every finger, and a design you can repeat. Salons use them, and so do people who just want neat nails at the kitchen table.
This guide covers the main types of nail templates, how to use them without smudging, and how to choose or print your own.
What are nail templates?
The phrase covers a few different things, which is why searches can be confusing:
- Stencils and guides. Adhesive strips or sheets with cut-outs for tips, half moons, stripes and shapes. You press them on, paint over them and peel them off.
- Printable shape sheets. Outlines of nail shapes, such as square, oval, almond and coffin, used to plan a design on paper before touching your nails.
- Nail form templates. Used for acrylic or gel extensions, where a form is placed under the free edge to guide the sculpt.
- Salon planning sheets. Hand diagrams where nail technicians sketch a client’s design and note the products used.
Why use a template instead of freehand?
Consistency is the main reason. Ten nails need ten matching curves, and doing that by eye is tricky even for experienced people. A template also saves time: you spend less on corrections and clean-up. It is helpful for beginners who are building confidence, and for anyone who wants a design with sharp lines such as chevrons, stripes or geometric blocks.
How to use nail stencils step by step
- Prep the nails. Shape, buff lightly and clean with alcohol or a nail prep wipe so the stencil sticks.
- Apply base colour and let it dry fully. Wet polish lifts when you peel the guide.
- Place the template. Press the edges down firmly with a cuticle stick, especially around curves.
- Paint the second colour in thin coats, brushing from the stencil edge outward, not into it.
- Remove while slightly tacky. Peel the guide away slowly at an angle for the sharpest line.
- Seal with top coat to smooth any edges.
Tips for clean lines
Use thin layers. A thick coat of polish can seep beneath the edge and ruin the shape. If you notice bleeding, tidy it with a small brush dipped in remover. Also, avoid stretching adhesive strips; place them gently so they sit flat.
Printing your own nail templates
A printable sheet is a good way to plan. Draw or download an outline of your preferred shape, scale it to match your actual nails, and test colour combinations with markers before you commit. This is also an easy way to share a design idea with a friend or a nail artist. If you design flyers for a nail business, the guide on choosing a website template may help you present your work online.
Choosing a nail shape
Shape changes how a design looks. Short square nails suit bold blocks. Almond nails elongate fingers and flatter gradients. Round and oval shapes are practical for everyday wear. Consider how you use your hands: long coffin nails look great but can be awkward for typing or cooking.
Staying safe and hygienic
- Do not reuse adhesive guides on someone else.
- Wash hands and clean tools before each session.
- Avoid products that cause burning or heavy irritation, and stop if you notice redness.
- If you use forms for gel extensions, follow the manufacturer’s instructions and ventilate the room.
For general information on nail health, the American Academy of Dermatology’s nail care advice is a reliable starting point.
Using templates for a nail business
If you run a small studio, planning sheets help you record each client’s design, colours and timing. That makes repeat visits faster and reduces mix-ups. A simple sheet with a hand outline, a notes box and a price line is enough. When you start charging for more complex looks, our guide on how to price your services will help you set fair rates.
Where to go from here
Start with a basic set of stripe and tip guides, practise on one hand, and build up to patterns. Keep a few favourite shapes printed in a folder, and you will always have a starting point. Over time, you may find you need templates less because your hand has learned the curves.
Common problems and how to fix them
Polish bleeds under the guide. This almost always means the stencil was not pressed down, or the coat was too thick. Wipe the nail clean, reapply and use thinner layers.
The base colour lifts when you peel. Wait longer before you place the guide, or use a quick-dry top coat on the base first so the surface is hardened.
Lines look wobbly on curved nails. Cut a flexible strip into smaller sections, so each piece follows the nail’s curve rather than bridging it. A tiny dot of cuticle oil beside, not under, the edge also stops the strip from catching skin.
Designs look different on each hand. Mirror your template. Many sets include left and right versions, or you can flip the guide over before applying it to the other hand.
Image: “French Manicure with Glitter nail art on ring finger” via Wikimedia Commons, CC BY-SA 4.0.

Written by
The Templates Hub editorial team writes practical, plain-English guides for everyday readers.
More articles by this author →
Router Templates for Woodworking: Make Reusable Jigs
Router templates are simple guides that let a woodworker cut the same shape again and again. A well-made…
Avery.com Templates: Finding and Using Label Layouts
www.avery.com templates explained: match your product number, pick the right layout, set up the print and avoid common…
Infographic Templates: Tips to Make Data Easy to Read
Infographic templates let you present facts, steps and comparisons as pictures that people actually finish reading. Rather than…

Tattoo Templates: Stencils, Flash Sheets and Safe Prep
Tattoo templates explained: flash sheets, stencil paper, sizing on the body, and why a design should always be…