
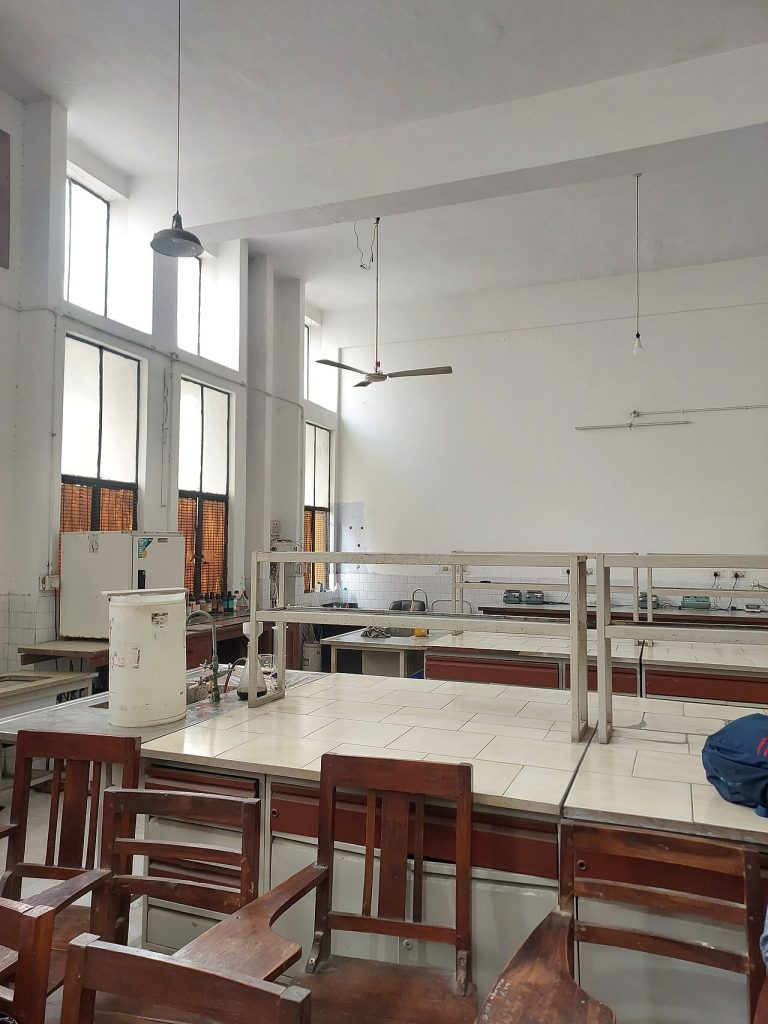
Laboratory worksheet templates give students a clear structure for recording what they did, what they saw and what it means. A good worksheet teaches habits that matter in science: careful notes, honest data and reasoning from evidence. For teachers, it also makes marking faster because every report follows the same pattern.
Core sections of laboratory worksheet templates
Most experiments fit this structure:
- Title, name, date and lab partners.
- Purpose or question: what are we trying to find out?
- Hypothesis: a prediction with a reason.
- Materials and safety notes.
- Procedure: numbered steps.
- Data table: space for measurements with units.
- Observations: what happened, in words.
- Analysis: calculations or graph.
- Conclusion: was the hypothesis supported, and why?
- Sources of error and possible improvements.
Younger students need fewer sections and more prompts; older students can write more freely.
Designing for the age group
Primary school
Use big boxes, simple language and pictures. Ask “What did you see?” rather than “Record your observations”. Include a sentence starter such as “I think … because …”.
Middle school
Add data tables and a graph area. Introduce variables: what we change, what we measure, what we keep the same.
High school and beyond
Ask for uncertainty, units, calculations and a discussion of error. Leave space for sketches of apparatus.
Safety matters
Print the safety rules at the top: goggles, tied hair, closed shoes, no tasting. List hazards for each experiment next to the materials. A short checkbox where students initial that they read the rules builds a record and reinforces the habit.
Make the data table work
Provide column headings with units, such as “Time (s)” and “Temperature (°C)”. Leave enough rows for repeated trials, and a final row for averages. If you give a sample row, label it clearly so it is not mistaken for real data.
Pair worksheets with lessons
A worksheet works best when it fits a wider unit. Combine it with a lesson plan template that lists objectives, timings and assessment. For slides to introduce the experiment, use Google Slides templates, and for recording results in bulk, a sheet from Google spreadsheet templates.
Grading with a rubric
Create a short rubric with four or five criteria: following procedure, accuracy of data, analysis, conclusion and safety. Share it before the lab, so students know the expectations. Give brief written feedback on one strength and one thing to improve.
Digital versus paper
Paper is simple and works when benches are wet. Digital forms save paper and allow automatic collection, but need devices. Many teachers use paper in the lab and then type the analysis at home.
Tips for teachers
- Test the experiment yourself and fill the worksheet first.
- Keep instructions short, one action per step.
- Reuse the same layout through the year.
- Collect reports promptly while memories are fresh.
Example: a simple density experiment
Purpose: find the density of three liquids. Materials: measuring cylinder, balance, water, oil and salt water. Procedure: measure mass and volume for each liquid three times. Data table: columns for trial, mass, volume and density. Analysis: calculate each density and average the trials. Conclusion: rank the liquids and explain why the oil floats on water. The example shows how each section on the worksheet nudges students toward a complete, logical report.
Supporting students who struggle with writing
Offer sentence starters such as “My results show that …” and word banks with key terms. Allow sketches or photographs in the observation box. For students who need extra time, share the data table in advance. Small adjustments keep the science at the centre while the writing catches up.
Storing and reusing worksheets
Keep one master per experiment in a labelled folder and add the date of the last revision. After each class, note changes you would make, such as clearer steps or more space in the table. Over a few terms you will have a polished set of lab worksheets that you can share with colleagues.
Linking the worksheet to prelab questions
A short prelab section with three questions, such as “What is the independent variable?” or “Which safety rule applies?”, improves preparation and reduces confusion at the bench. Students who think before they begin make fewer mistakes and learn more from each experiment.
Group work and roles
Assign roles such as manager, recorder, materials handler and safety officer, and rotate them. Add a small box for each student to initial their part. This keeps every member involved and makes fair marking easier.
Digital copies for absent students
Keep an electronic version of every worksheet so that students who miss a lab can complete a data-analysis version using shared results. Provide the class data in a simple table and ask the same analysis questions. This keeps everyone on track without repeating the practical.
Frequently asked questions
How long should a lab report be?
One to two pages for most school experiments.
Should the hypothesis be graded?
Mark the reasoning, not whether the prediction turned out right.
Can I adapt a template for different subjects?
Yes. Biology, chemistry and physics all fit the same skeleton with different tables.

Written by thadmin_r7
The Templates Hub editorial team writes practical, plain-English guides for everyday readers.
More articles by this author →
Point of Care Medicine Templates: Types, Benefits and Risks
In a busy clinic, documentation competes with the patient for attention. Point of care medicine templates are structured…
One Pager Templates: Layouts and Tips for a Clear Summary
Busy people rarely read long documents, which is why a single page can carry more weight than twenty.…
Google Drive Templates: Organise and Reuse Your Files
Most people treat Drive like a junk drawer where files go to be lost. A cleaner approach is…
Microsoft Word Templates: Find, Edit and Build Your Own
Word has been the default tool for letters, reports and CVs for decades, and Microsoft Word templates are…